Stop Waiting. Start Staining... Plus a giveaway!
This is what it looks like outside my house right now. It's raining cats and dogs which isn't exactly prime DIY weather. See that playground in the background being soaked to the core? It really needs to be restained but between waiting for it to be completely dry and then remain completely dry for 16 hours afterwards... well, there's a reason it's never getting done.

This is what it looks like outside my house right now. It's raining cats and dogs which isn't exactly prime DIY weather. See that playground in the background being soaked to the core? It really needs to be restained but between waiting for it to be completely dry and then remain completely dry for 16 hours afterwards... well, there's a reason it's never getting done.
Enter Olympic MAXIMUM® Stain + Sealant in One with WEATHER-READY™ application.
Now, you can stain damp wood, which is then rain-ready 8-12 hours after application. Mother Nature is no longer in charge of your DIY plans. You're not at the mercy of precipitation or temperature because Olympic also offers a wider range of application temperatures from 35 F to 90 F... and we reach 90 pretty quickly around these parts.
And speaking of these parts...

The Olympic MAXIMUM ® WEATHER-READY™ stain truck is making its way across these parts RIGHT now with stops today in Clarksville (a little over an hour south of Paducah!) and then on to Knoxville before hitting North Carolina. They are attempting to break the standing Guinness World Record for the “largest paintbrush mosaic,” while also providing Lowe’s shoppers and guests with interactive demonstrations of Olympic Maximum stain.
Oh! AND Olympic is giving away a $100 Lowes Gift Card to one of y'all!
I received a $150 Lowes Gift Card and Olympic Maximum Stain in exchange for writing this post on the blog. All opinions are my own.
How I got my family to help around the house
Recently, I looked around my home and realized I WAS DOING ALL THE THINGS.
I am lucky enough to have a husband who cooks and does most of the grocery shopping. But guess what? With church and community events and family obligations, we can go days and days without eating dinner at home, which means he is basically off the hook.
But breakfast? Packed lunches? Laundry? Picking up? Cleaning up? Plain ole KEEPING UP?
That was ALL. ME.
Add in the time I spend feeding, changing, and generally caring for baby Felix and suddenly there was no time leftover for my work… much less leisure.
I like to think of myself as hardcore when it comes to household chores. I like to think of myself as a mom who pushes her kids towards independence and responsibility.
One of my proudest moments was at Griffin’s pre-K Mother’s Day luncheon a few years ago. When asked “What’s your mom’s favorite thing to do?”, LOTS of children answered that their mother’s favorite thing to do was wash dishes or cook dinner or go grocery shopping.
I was pleasantly surprised when Griffin’s answered, “Reading Harry Potter.”
BINGO! An actual leisure activity! My kid knows I don’t enjoy household drudgery because I say so on a pretty regular basis.
And yet… assigning age-appropriate chores takes thought. Teaching children to do chores takes time. Following through and making sure your children actually do the chores takes energy.
With a new baby, I'm lacking on all three, which is how I ended up doing all the things.

This is how I stopped.
1. Announce a change
First, I told my children and my husband that I wasn’t going to do ALL THE THINGS any more. I needed help so I started by asking for it.
2. Take the time to teach
Next, I taught Griffin how to drag our laundry out to the washing machine every day after school. We use one laundry basket at the end of the hall. Everything goes in. Everything gets washed on cold. I made that change a few months ago on the recommendation of a friend and it makes all the difference. No more sorting and worrying about who needs clean clothes.
I also bought Tide PODS so Griffin can load it and start it himself. Then, I informed Nicholas he would need to switch it to the dryer every day when he got home for work.
Folding and putting away still falls to me, but I’m finding it’s not such a chore when I’m not also in charge of the washing and drying.
3. Make the chores kid-friendly
Next, I spent an entire day cleaning out our kitchen cabinets and moving ALL of our dishes, glassware, cookware, and utensils. Everything is now where the under-7 set can reach it. I moved our plates and bowls and glasses to the open shelving on each side of our island so that Griffin and Amos can now unload the dishwasher.
I could practically hear angels sing as I wrote that last sentence.
My kids now unload the dishes. ALL the dishes. Not just the silverware. THE DISHES.
Bonus: They can now clean up their places after every meal, unpack and put away their lunch boxes, AND set the table.
How did I know I’d gone WAY too long shouldering most of the household chores myself?
The first day Amos had to put his own dishes in the dishwasher he looked at me and asked, “Why are you making us do all the work?”
I laughed manically in his face and then went back to sipping champagne as Griffin fanned me with giant peacock feathers.
Just kidding!
I went back to feeding Felix and told him that everyone in a family helps out. He was a big boy now so he could start helping out around the house!
So far, it’s going GREAT. Turns out slaving away resentfully without actually asking for help wasn’t the best approach. Go figure! It was work putting the new systems in place and I’m sure we’ll have to make changes here and there to keep things running smoothly.
But - in the meantime - I’ll be over here reading Harry Potter while my kids set the table.


5 Lessons from The Life-Changing Magic of Tidying Up
Several months ago, my dear friend Annie texted me pictures of her neatly organized drawers and told me to stop what I was doing and read Marie Kondo’s The Life-Changing Magic of Tidying Up: The Japanese Art of Decluttering and Organizing.
When Annie says, “Read this book. Do it now.” I do it.
I have been battling with my stuff for a long time. A few years back I announced a massive project in which I was going to declutter and inventory my entire house. Never happened. I tried going room by room and intensely declutter. Never happened.
I would walk around my house and feel like the piles of stuff were mocking me. I would spend weekends purging and organizing but never feeling like I got anywhere.
I was exactly what I didn’t want to be. I was a stuff manager.
The problem was I thought I already knew everything there was to know about organizing. What could Marie Kondo possibly teach me?
Turns out. A LOT.

My former "junk" drawer.
1. Everything I knew about organizing was wrong.
Tackling organization a little bit at a time? WRONG. Going room by room? WRONG. Finding just the right “system” for organization? WRONG.
Marie Kondo throws out all the classic organizing advice bit by bit until she’s left with one simple truth.
2. We should be choosing what we want to keep, not what we want to get rid of.
That is POWERFUL insight right there.
For YEARS, I spent all my energy using my space to keep what I had. If I had an empty drawer, I filled it. If I collected extra supplies, I stored them. If I had space, why not?
Because the space in your house represents the space in your life and there is only a FINITE amount of it.
Even the very back corner of a little-used closet represents mental energy and how do you want to spend your mental energy? Managing stuff?
Well, NOT. ME.

My t-shirt drawer. BELIEVE in the vertical fold.
3. Every item in your home should spark joy.
The KonMari method requires you place every single item in your hand and ask does it spark joy? If it doesn’t, it goes!
I know that sounds extreme and she makes allowances for items that you use on a daily basis or need to but can’t afford to replace.
However, I still think those things bring joy. My little boxcutter tool doesn’t necessarily spark joy when I hold it in my hand. But you know what does? Having it perfectly stored in its own space and seeing that space occupied by something that I use almost daily!
4. It’s about the EMOTIONS - not the stuff.
“When you come across something that’s hard to discard, consider carefully why you have that specific item in the first place. When did you get it and what meaning did it have for you then? Reassess the role it plays in your life. If, for example, you have some clothes that you bought but never wear, examine them one at a time. Where did you buy that particular outfit and why? If you bought it because you thought it looked cool in the shop, it has fulfilled the function of giving you a thrill when you bought it. Then why did you never wear it? Was it because you realized that it didn’t suit you when you tried it on at home? If so, and if you no longer buy clothes of the same style or color, it has fulfilled another important function—it has taught you what doesn’t suit you. In fact, that particular article of clothing has already completed its role in your life, and you are free to say, “Thank you for giving me joy when I bought you,” or “Thank you for teaching me what doesn’t suit me,” and let it go. Every object has a different role to play. Not all clothes have come to you to be worn threadbare. It is the same with people. Not every person you meet in life will become a close friend or lover. Some you will find hard to get along with or impossible to like. But these people, too, teach you the precious lesson of who you do like, so that you will appreciate those special people even more.”

No. More. Stacking.
That passage fundamentally changed how I feel about my belongings. First of all, I realized that discarding something didn’t mean I thought it was worthless. Feeling like a once precious object was now worthless kept me from getting rid of it. Now, I realize I can say thank you for an object’s role in my life and then let. it. go.
The sweater I loved to snuggle up in our first winter back in Paducah? Thanks for the memories and goodbye. The book that changed my worldview in college? Thank you for the insight and goodbye. The CDs I listened to a thousand times in 2007 but never since? Thank you and goodbye.
5. Practice makes perfect.
Marie Kondo has a specific order in which you tackle your clutter - category by category. You begin with clothes then go one by one until you finally sort sentimental belongings.
Over the past few months, I’ve worked through each category with only kitchen accessories and the sentimental belongings left.
It has been FREEING.
She’s right. You get better and better at understanding which items bring you joy and which you can let go.
And, as I get better at it, I feel less like I live among my stuff and more like my home is a place of peace and joy.
If you’ve felt weighed down by your stuff, this book truly is life-changing.
Any of y'all already KonMarie converts?


Felix's Nursery
This post is sponsored by Hibou Home - a sophisticated collection of contemporary, designer wallpapers and fabrics inspired by timeless themes children know and love.

Even before I knew whether our third baby was a girl or a boy, I knew I wanted a traditional nursery. I've done modern. I've done rustic. I wanted a nursery that was delicate and light and ALL BABY.
As I began looking for inspiration, I found myself drawn over and over again to nurseries featuring wallpaper. During my search, I found Hibou Home, which features the most precious children's wallpaper you've ever seen. I immediately fell hard for the Secret Garden design in Waterlily.

I didn't want to paper a whole wall knowing the nursery would only be used for a couple of years. Instead, we put up three panels and framed the panels out with molding spray painted gold. Then, I added a gold branch accent that I'd inherited from my great-aunt. I absolutely love the finished product.


I loved the wallpaper so much and had PLENTY left over that I decided to cut silhouettes of all three boys using the remainder. I used my Silhouette Cameo, which cut the wallpaper perfectly and recycled frames my mother had given me. I especially love Griffin's profile with the branch falling across the middle!


The rest of the room features our old changing table and new rocking chair both with a fresh coat of custom-mixed chalk paint by Flower + Furbish. I hung the "where" print by holli and painted "sweet dreams" using This Little Street's printable as a stencil.


I'm so happy with the results!
AND I STILL had wallpaper leftover so my friend Liz used it in her baby girl's nursery!


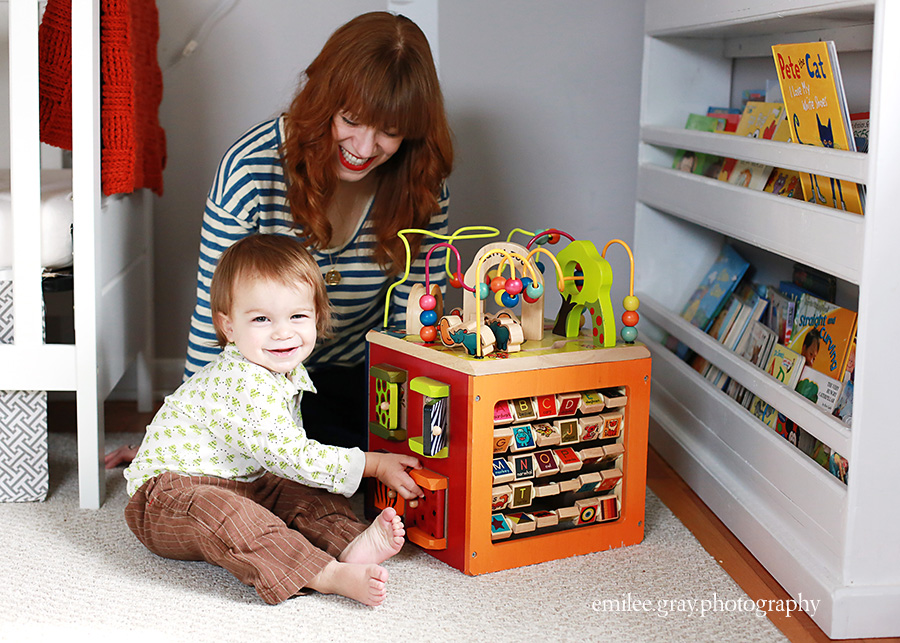
Amos's Nursery
The centerpiece of the room is the wall decal by Designed Designer. I wanted the main palette to be a soft gray and white with pops of orange so I painted the walls Sherwin Williams Grayish.
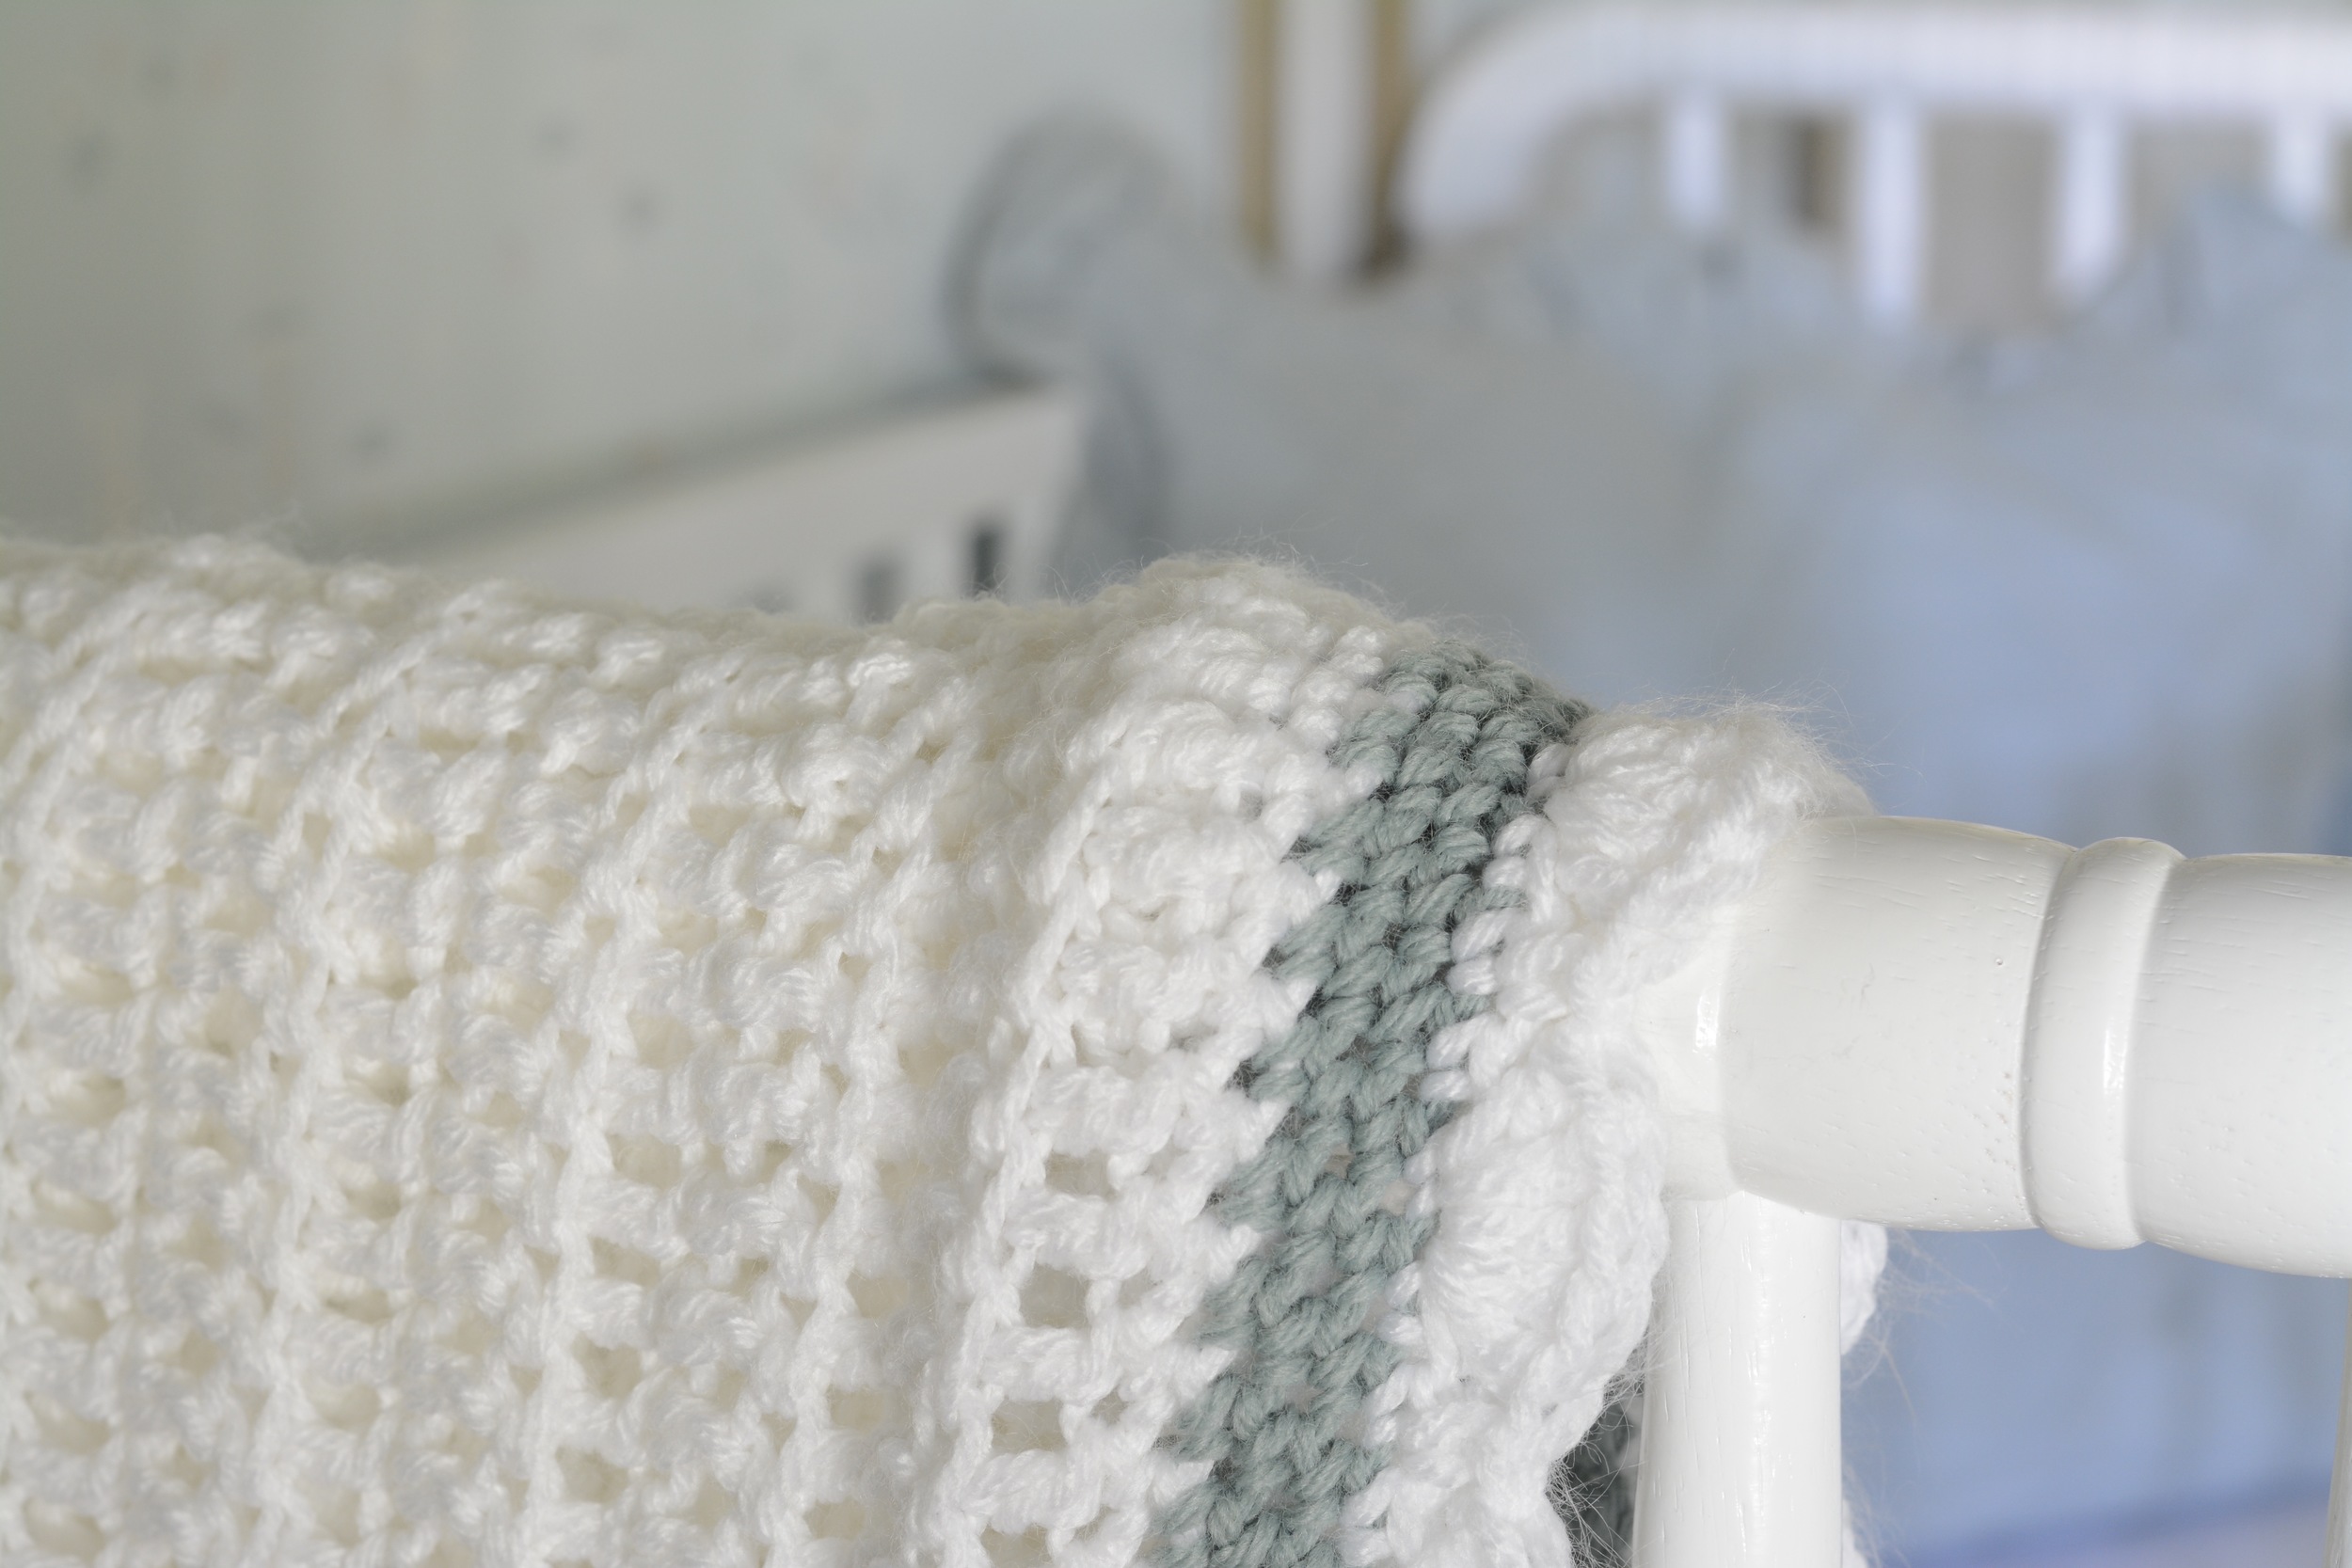
We've been so happy with Griffin's Baby Mod crib that we went with Baby Mod Modena 3-in-1 Fixed-Side Convertible Crib for Amos. My mom sewed the crib skirt out of Waverly Cross Section in Charcoal, which also makes an appearance on the pillow in the rocker and and the closet curtain. My mom made all of these and I'm so grateful! The gorgeous hand crocheted blanket was a gift from my friend Annie.

The bookshelf is an original built by my stepdad. Griffin has an identical shelf, which I partially credit for his passion for books. I love how it makes books a part of the room and how easily accessible they are. The birdhouse nightlight was also crafted by my stepfather from a basic birdhouse bought at Michael's. I cut the little squirrel and bunny decals on my Silhouette using white flocked vinyl.
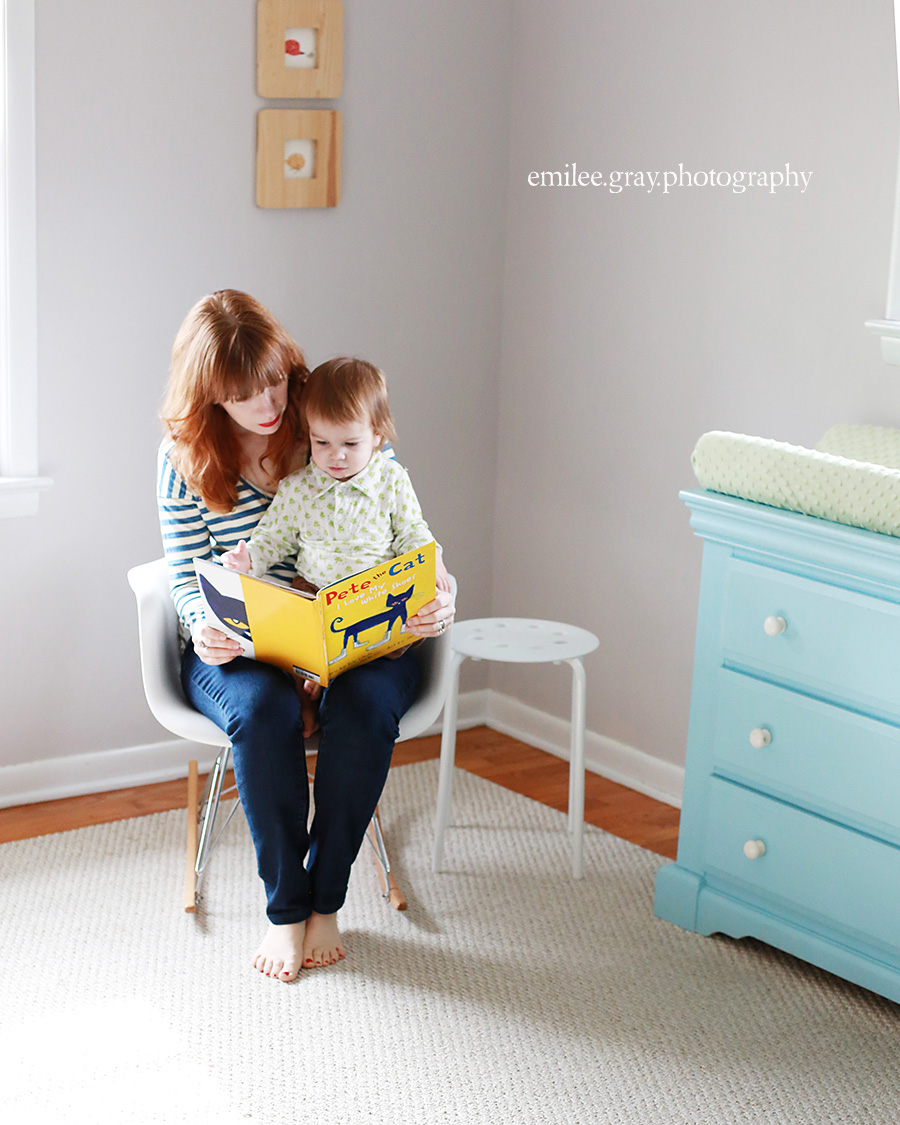
I got my Eames (ripoff) rocker as planned and added a grey knitted pouf from CB2 andMarius stool from Ikea. One of my favorite pieces in the room are the limited edition Heather Ross prints hanging above the rocker. (I had them first, btw!)
Beyond my original palette of gray, white, and orange, I brought in a light blue and green using the Give a Hoot Shower Curtain from Target. I bought one curtain to hang in front of the closet and an additional one for the rocker pillow and window shades. For the shades, I simply cut out some of the owls and used spray adhesive to adhere them to my roller shades.
The changing table was a generous gift from a friend which I painted blue to match the owls in the curtain. The color is Sherwin Williams Liquid Blue. I love the way the yarn initials fit above the table.

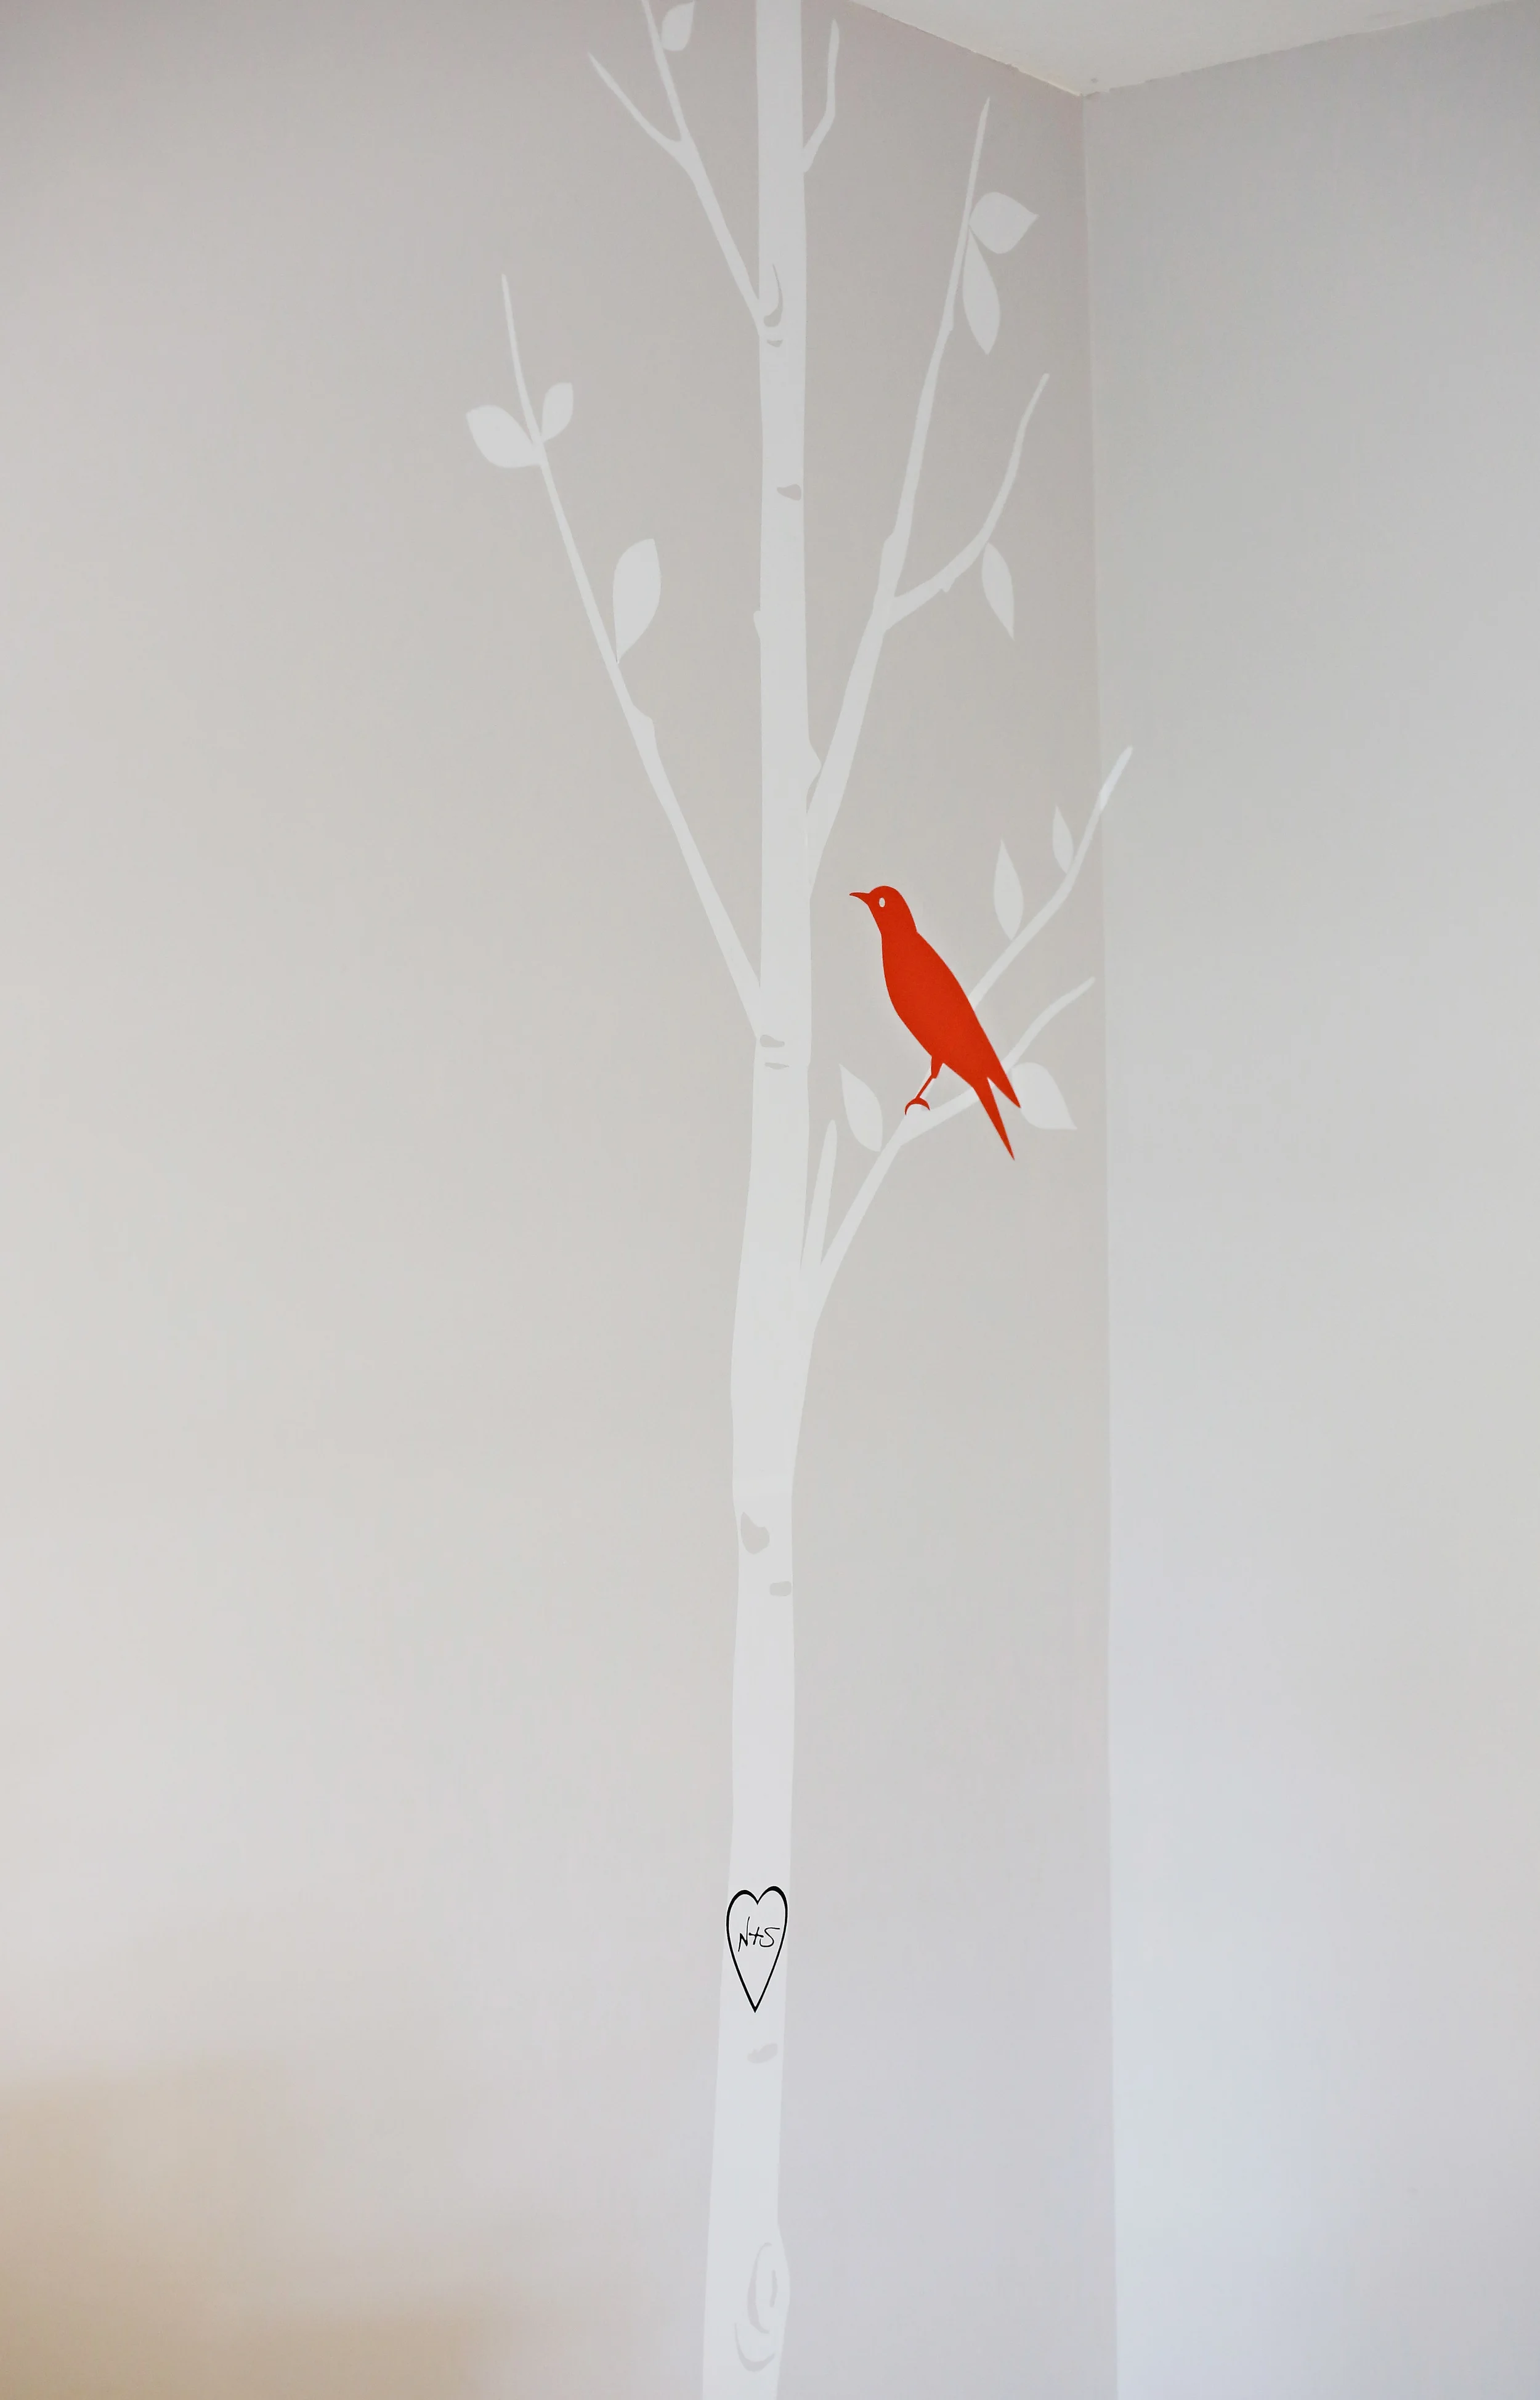
This tree is one of my favorite touches. I decided at the last minute to move one of the decals in to the corner of the room and then I added a black vinyl decal (cut on my Silhouette of course) that make it look like Nicholas and I carved our initials in the tree. Nicholas thinks it's cheesy, but I don't care

Below the tree is a table and chairs my grandparents gave to me as a child. As far as the closet, since I never EVER close Griffin's closet doors I decided to remove the doors in Amos's room and make it part of the room. I painted the inside of the closet the same orange as the birds. It was scary at first but I really like the way in turned out.
In fact, I love the way the entire room turned out. It's so serene and is one of my favorite rooms in the house. We took Amos's newborn portraits in there and I have to say he seemed pretty at ease there as well.
Preparing for Winter with Ryobi Outdoors
I received a free Ryobi 40V Blower from Ryobi and a trip to Ryobi headquarters in exchange for writing a review.
Well, PREPARING for winter implies winter has not arrived yet but then again...

Maybe we should just say dealing with a winter that showed up early and unexpectedly in NOVEMBER!
Either way, the temperatures have fallen and it's time to bring out the warm blankets and roaring fires. We've had a stack of free wood sitting outside our house for over a year... because who turns down free wood!?! The only problem was most of the logs were WAY too big to use in a fire.
When Ryobi sent us the 40V Brushless Chainsaw, Nicholas suggested we use it to cut down some of the bigger logs into manageable slices. It worked like a charm without the hassle of gas and oil and had the power of the 40V battery we've gotten used to with the 40V Jet Blower and 40V String Trimmer.
Both Nicholas and I were so impressed with the results and we had our roaring fire that evening to celebrate!

5 Easy Projects to Update your Holiday Decor!
This weekend I confessed in my weekly email (subscribe if you haven't already!) that I've been preparing for Christmas for months. The presents are bought and wrapped. The Christmas cards are ordered, addressed, and stamped. And this week I started decorating.
Instead of killing myself to get my entire house decorated the weekend between Thanksgiving and December 1st like I usually do, I'm taking my time decorating each room at my own pace. The biggest benefit so far is I've had time to redesign my decor and complete projects I've been wanting to do for years.
Pinterest is a great source of inspiration but I'm hoping this post to be a great MOTIVATOR. Here are the projects I pinned - primarily holiday themed - that I completed this weekend!
White-on-White Holiday Canvas

I saw this canvas on Inspiration for Moms and thought it would fit really well in my winter wonderland themed dining room.
Since I love all things related to Christmas music, I chose a line from one of my favorites "Have Yourself A Merry Little Christmas".
"Faithful friends who are dear to us gather near to us once more."
A quick trip to Michael's for the wooden letters and some hot glue and white spray paint letter and VOILA!
Pinned: TWO YEARS AGO!
Ease of Completion: SUPER easy. Counting trip to Michael's, it took maybe an hour.

Christmas Reindeer Wall Mount

I have a new gallery wall surrounding my TV and I knew I wanted to substitute some Christmas decor on it. I thought this little reindeer I found on Tidy Mom would be perfect.
I used chalk paint for mine and subtracted the glitter on the antlers and pom pom nose but otherwise I stuck pretty close to the original.
I'm SO happy with the result and he looks perfect on my gallery wall!
Pinned: One Year Ago!
Ease of completion: Another EASY project. Counting the trip to Michael's, this one probably only took about 45 minutes.

Gilded Reindeer Vases

I've had some vases from my sister-in-law's wedding sitting around waiting to be infused with new life and I knew this project from Sew Can Do would be a great way to pretty them up and make a great centerpiece for my holiday table.
I made quite a few adjustments to her material list. I used white chalk paint and gold craft paint that I already had on hand. I also cut the reindeer using my Silhouette, which was much easier.
I absolutely love how they turned out!
Pinned: One year ago
Ease of Completion: The craft paint was tricky. The gold leaf might have been easier truthfully.

Rag Wreath

A couple of years ago I made this Paper-Doily Wreath from Martha Stewart. It looked great for a while but the paper doilies were starting to show their age and it was basically falling apart. So, I stripped it down and decided to reinvent the wire wreath frames as rag wreaths.
I needed a new wreath for my front door and a smaller wreath for my OTHER gallery wall (No judgment! I like gallery walls!) so this tutorial from Craftaholics Anonymous was perfect.
Unfortunately, I looked at tutorial that used regular fabric when estimating how much burlap I would need and I ended up with WAY. TOO. MUCH. I used a bow I already had for the larger wreath and used this tutorial Refresh-Renew to create a bow for the small red wreath.
Pinned: TWO YEARS AGO!
Ease of Completion: There's a lot of cutting and tying and a lot of mess from the burlap but otherwise not that bad.

Mr. & Mrs. Claus Pillows

I have been meaning to add some holiday pillow covers to our decor for a while but never had time. I absolutely loved these pillows from Sabbe Interior Design.
I had planned on buying some plain white pillow covers but since I was now covered up in burlap I decided to make and paint my own. I used white chalk paint to outline the silhouettes. It's a little bit different look but I was really happy with the result.
Pinned: A year ago
Ease of Completion: Their version would be easier than mine.


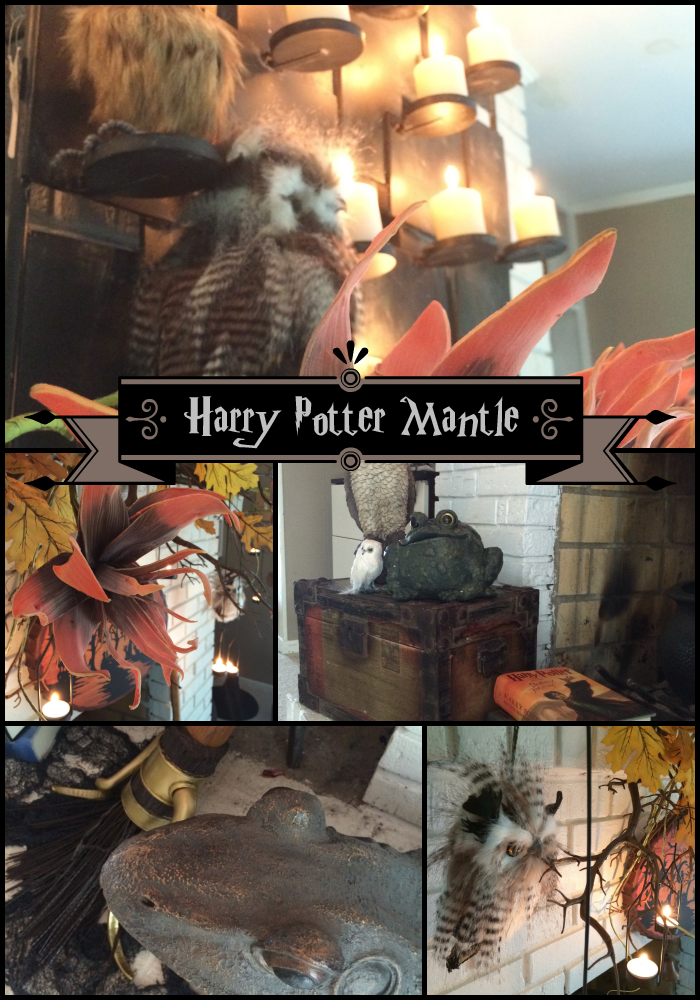
A Harry Potter Inspired Mantle with Trees n Trends
Recently, I partnered with Trees n Trends, a fabulous regional home decor chain based in Paducah. With stores in Alabama, Arkansas, Mississippi, Missouri, Kentucky, and Tennessee, Trees n Trends is the place to go for everything from outdoor furniture to holiday decor. (P.S. They have online ordering!)
After I joined the team, I mentioned to one of the designers that we were having a big Harry Potter year at the Holland household between our upcoming trip to The Wizarding World of Harry Potter and dressing up as Harry Potter characters for Halloween. He suggested coming to my house and designing a custom Harry Potter mantle.
I was all ... hmmmm, I don't know.
Oh, I'm sorry what I actually said was YES YES YES PLEASE YES!!!! CAN WE GO NOW!?!?!
So, after a trip to Trees n Trends, Kevin came to my house and designed the most awesome mantle of all time. Don't believe me?

My podcasts


Subscribe to my weekly email


- August 2017
- March 2017
- January 2017
- November 2016
- October 2016
- September 2016
- August 2016
- June 2016
- May 2016
- April 2016
- March 2016
- February 2016
- January 2016
- December 2015
- November 2015
- October 2015
- September 2015
- August 2015
- July 2015
- June 2015
- May 2015
- April 2015
- March 2015
- February 2015
- January 2015
- December 2014
- November 2014
- October 2014
- September 2014
- August 2014
- July 2014
- June 2014
- May 2014
- April 2014
- March 2014
- February 2014
- January 2014
- December 2013
- November 2013
- October 2013
- September 2013
- August 2013
- July 2013
- June 2013
- May 2013